How to use and setup groups
Groups are a great way for teams of people in your company to work together in Zinc. You can assign check packages to a group rather than them being available to all Admins. Every group has its view of Zinc, so members can easily see and manage the checks packages assigned to the group.
Here are a few examples of how you might want to use groups:
- Have multiple locations in your company? Create a group with the hiring manager for each location.
- Recruiting for multiple departments? Setup a group for the people responsible for hiring for each department.
- Want to limit who can see seniority? Create a group specifically for those team members.
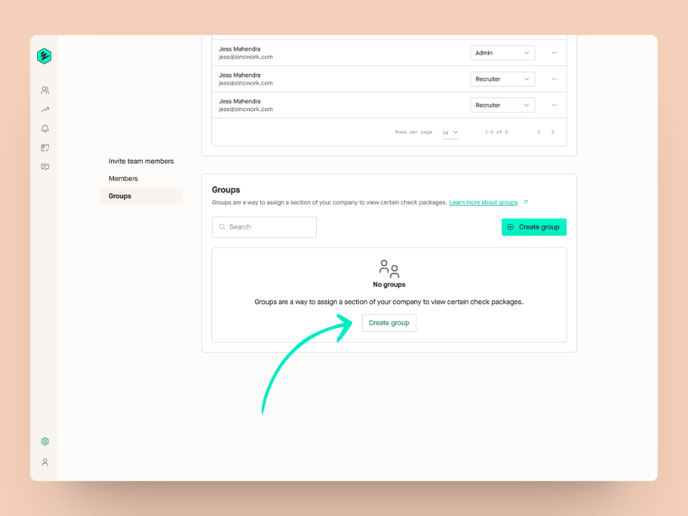
Setting up a group
You can set up a team from Company settings > Team. Scroll down to the “Groups” section select "Create group" and give your group a name.
Then, add your team members. You can always come back later and add new members or remove existing ones.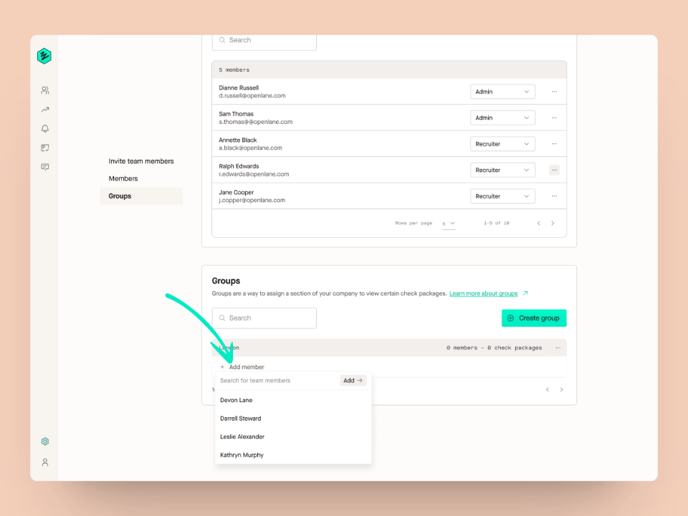
When team members are added to groups they have access to the packages assigned to that group.
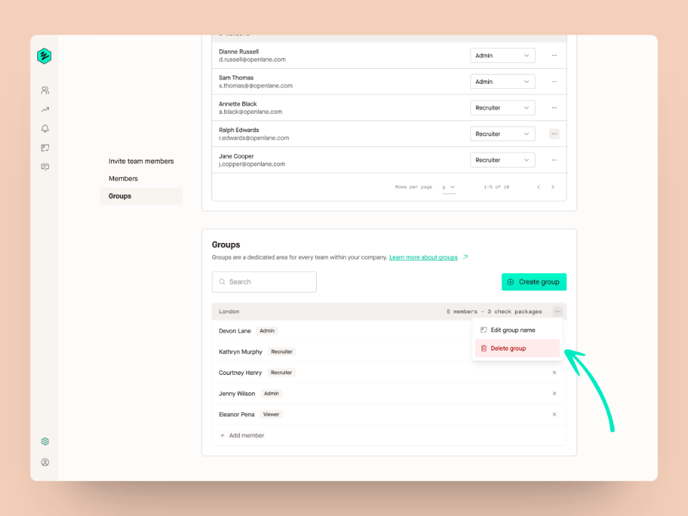
Editing a group
You can edit the name of the group by selecting the three horizontal dots in the group name header. From there select Edit group name, change the name to what you want and hit save.

Deleting a group
Deleting a group will not impact the associated checks and packages. This action will disband the grouping of users and cannot be reversed. Any existing checks will be visible to Admins.
You can delete a group by:
- Selecting the three horizontal dots in the group name header.
- From there, select “Delete group”.
- Confirm that you want to delete the group